Das Haus: The Utility Room

Hey guys! I know some of you are waiting and waiting for the kitchen reveal but sorry, it’s taking forever to finish. July is vacation season for most in Germany so we could not really push them kitchen guys to hurry things up. Anyway, it’s not that I’m still without a kitchen. It is actually pretty much complete now and fully functional, just the glass backsplash not yet installed. They just gave us a date for the installation on the 25th. So 2 more weeks!! 🙂

For now, at least let me share with you what we did to the utility room/scullery. I know it’s not a very exciting room but it’s really like the control room of the house. We’ve got all the household Technik there plus the laundry area. It’s not a big room with barely 8 sqm. A few extra square footage would have been ideal because it feels really cramped atm. But that’s mostly because we’ve got all the stuff that we hope to store later at the garage now piled haphazardly there in a small corner. Garage is scheduled for setup only in September so I guess I’ll just have to bear with this jumble for a bit longer.

Anyway I mentioned that we have a side door here from the garage. Here is what you’ll find upon entering. The door on the left is to the kitchen. So pretty much, this room is just a way-through to the house. Not  exactly for hanging out. Also since it’s small, we have to make it as organized as possible. We had the laundry area installed in this small niche, with extra storage for supplies and whatnots. I’m glad we had the machines side-by-side (instead of stacked) as I felt the extra countertop would be useful here, like an extension of our kitchen. The cabinets and worktop are from Nobilia and sink and tap from Blanco. I chose the dark gray upper cabinets to match the gray pipes in the ceiling. Admittedly, this corner is looking ho-hum right now but I already have plans to jazz it up so watch out for that 😉

HWR1

HWR2

Opposite the laundry area, next to the door is the would-be mudroom. Unfortunately, the wall space here is too short to fit the IKEA shoe rack that we already have. We’re still debating if we’ll just repurpose that or get a new one instead.

HWR6

This is the tight corner  where we have all the technical apparatuses. I think this is not even 3 sqm and we have to fit the boiler/heating system, electrical switchboard, water regulator, solar power converter, fiber-optic hook-up and that microwave looking box which is D’s LAN-network switchboard. I’m glad that apart from the boiler, they’re all compact. Thankfully they’ve shifted to a single-phase power transformer with the router already integrated in the switchboard. They don’t do separate meters anymore too for self-generated power and power consumed from the network.

HWR3

Speaking of solar power, we’re finally fully registered in the network and online now too! Here’s a screenshot of an app where we can check our real-time power output and consumption. The first bar says that so far, we’ve produced 25 kWh power, 72% of which we’ve routed to the network (i.e. sold) and the rest we’ve consumed. The second bar shows our cumulative consumption, 74% of which we’ve produced ourselves and the rest we bought from the network. Lastly the graph shows our production and consumption patterns for the day. The red is the power used from the network during the night for the appliances that run 24-7 like the fridge. You see a spike in power use in early morning. This is to jumpstart the boiler for hot water. The green area shows how much power had been produced and the blue area shows how much of it was used. For example, yesterday I used the dryer to account for that spike at 2 PM. Dryers do use a lot of power! But still, it feels good to know that we’re running it for free. Well technically not “free” since we also need to amortize the money we invested in this system. Overall though, whether we’d recover all of it or not, we’re happy we did it 🙂 We’re just curious how the Abrechnung will turn out by the end of the year.

solar


Das Haus: The Reveal – Part 2

Friends, back to our house tour. But before that, let me thank you for your positive feedback on my last post. I’m very flattered 😉 To think that my only motivation for doing this is to satisfy the curiosity of my devoted fans. Well, you know who you are 😉 Truly guys, thanks for your encouragement and support in this project 🙂

It’s almost a week now since we’ve moved in. Except for a few boxes in the office, pretty much everything has been unpacked already. Well, we don’t really own a lot of stuff and we’ve left some furniture and old hand-me-downs in the old apartment. We also managed to sell our 5 year-old kitchen to the Nachmieter, which is good. That’s still some money for the many things we need for the house.

Anyway, on to our tour. Today we’ll do the upper floor 🙂
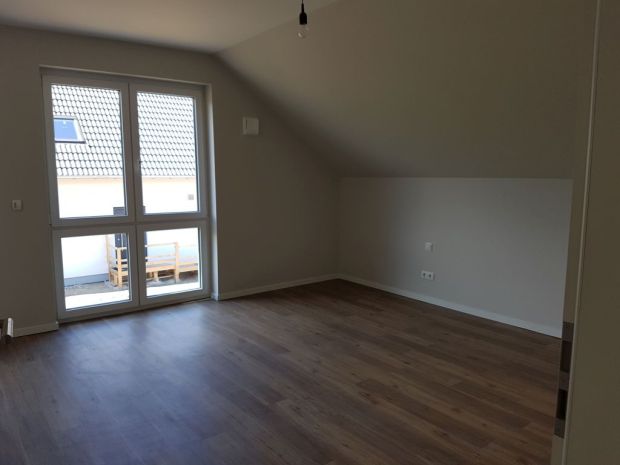
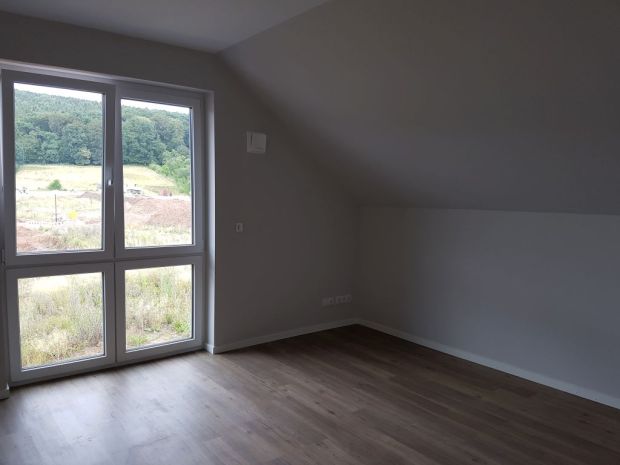
Our Bedroom

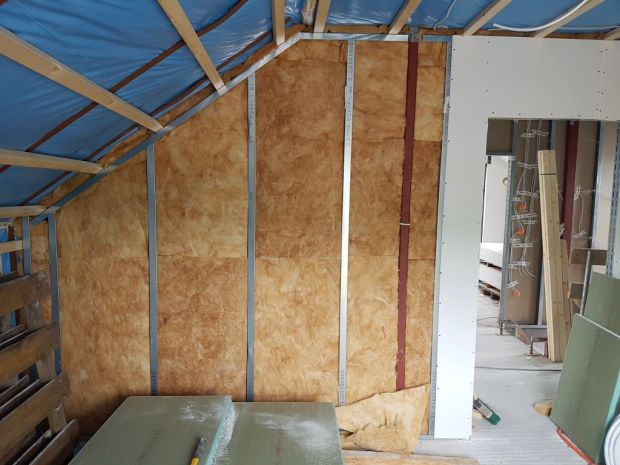
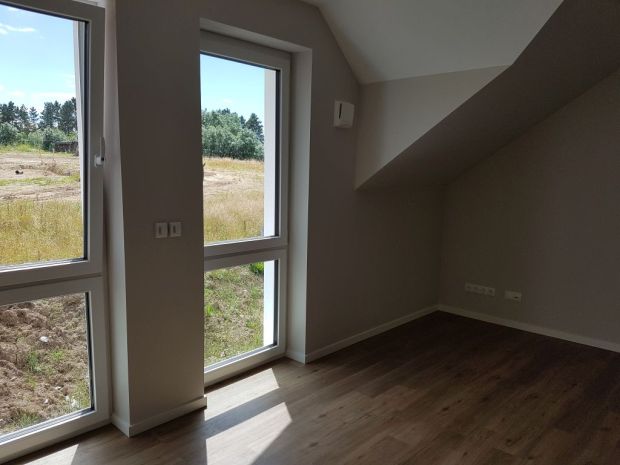
This is our bedroom. Our view is not really only that of our neighbor. From the window you see on the photo, we get a nice view of the Leine valley. It’s a nice spot for watching the sunset 🙂 You see the room is painted in the same warm gray that was painted downstairs, as all the other rooms in the upper floor. Also since our house is not a true 2-storey house, the rooms have vaulted or sloping ceilings like in a loft. This is very typical of German single-family homes. What we tried to do here though is to at least increase the height of the short wall by pitching the roof at a flatter angle, instead of the common 45° roof pitch where we’d only get less than a meter height. Here we’ve got 1.3-meter clearance which is good as it makes the space under the ceiling less cramped.

Masters1

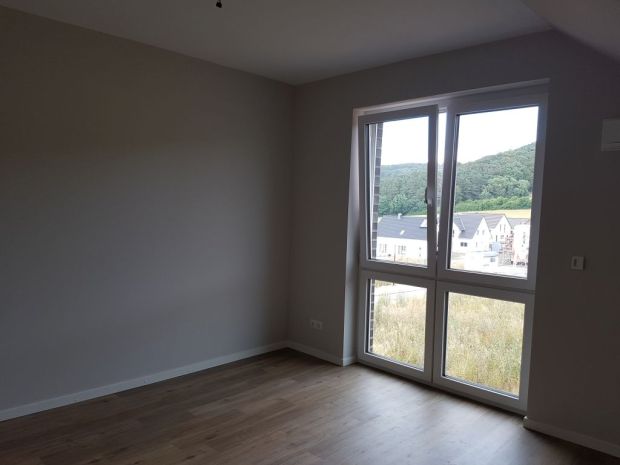
Here is the rest of the room from the vaulted side. Again we have the big windows. The opening on the right leads to a small changing room/walk-in robe.

Masters3

Masters4

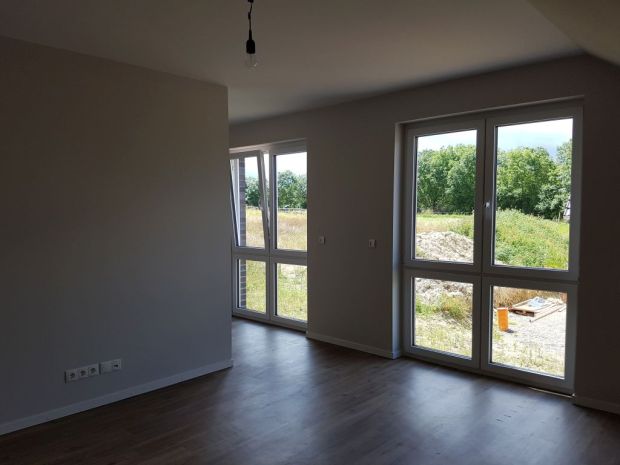
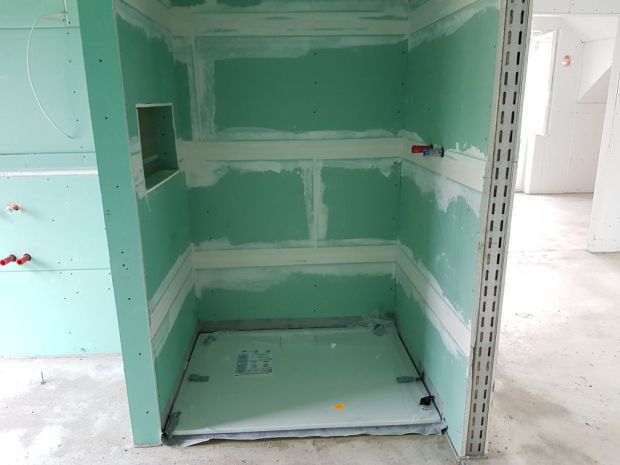
I think most walk-ins are walled on all sides. But since we got a window here, we lost some wall space for cabinet/shelving. Also unlike typical walk-ins with open shelving, we’ll have closed cabinetry. I don’t know how people keep their clothes staubfrei in open shelves. This room is about 7 sqm while the sleeping area is about 18 sqm.

Masters6

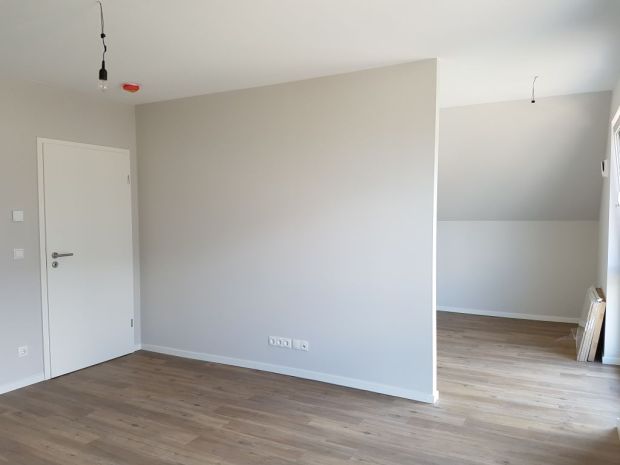
The sleeping area from the walk-in.

Masters7

Masters8

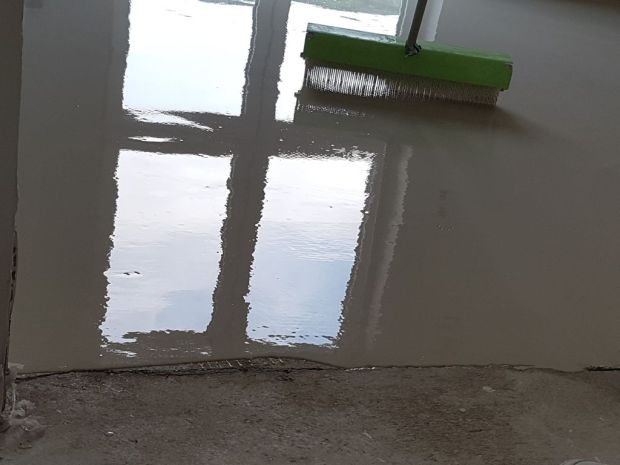
So about the floor. They’ve indeed come very far with the wood vynil tiles. Their looks and tactility have greatly improved to resemble the texture and appearance even of rough-sawn wood. We have here the classic waxed oak. There is one other option that I like better with less knotting and looks more elegant in my eyes, but of course also with a higher price tag. Looking back, we thought we could’ve just upgraded since we’re already deep into it. But it’s already done. I’d just say though that these are great alternative to wood parquet or laminates as they are more durable, less sensitive to scratching and staining, very easy to maintain, and they don’t discolor or fade such as when some areas get sun-bleached. The only thing about them is that they definitely don’t feel like wood, but surely comfortable enough to walk on barefoot. And yes, they don’t squeak 😀
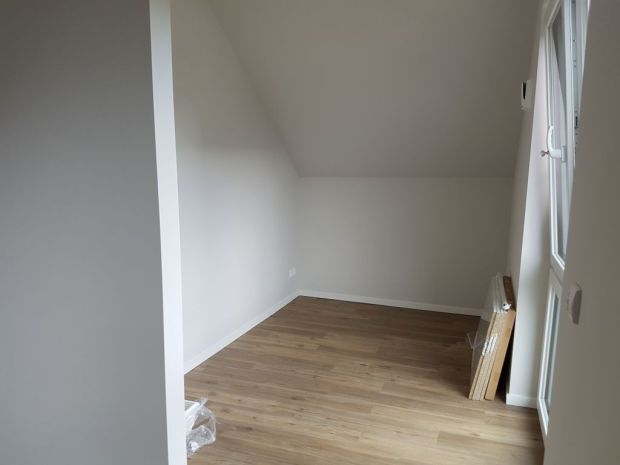
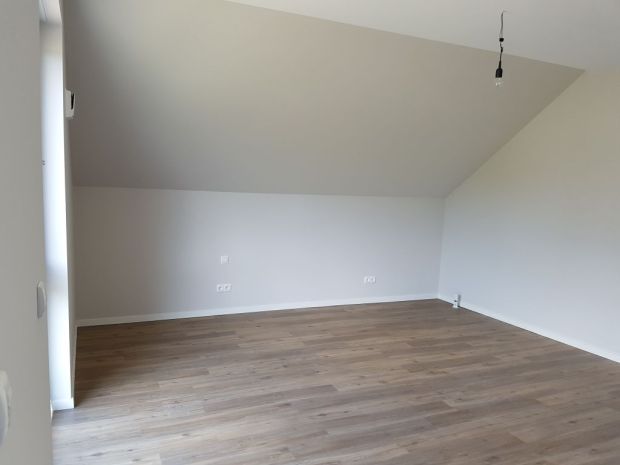
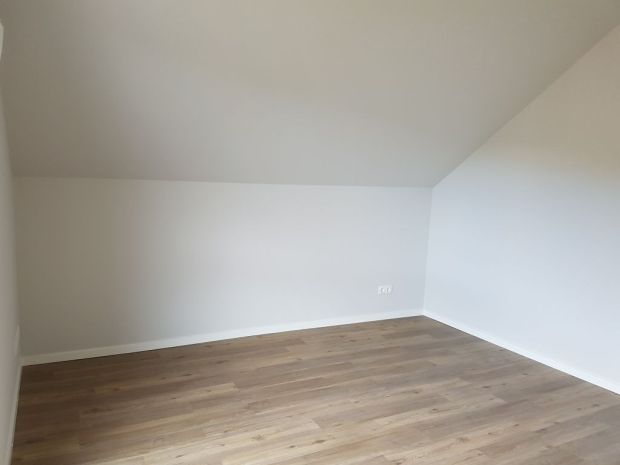
Guest Room

Now this looks a lot like our bedroom from this angle. It’s smaller at 14 sqm but an adequate size for a guest room I think. Here we have a fantastic view of the forest and hayfields with the horses. Kind of romantic and so idyllic 🙂

Guest room1

So no, the guest room doesn’t have a walk-in 😀

Guest room4

Here you’ll get a better feel of the room size. I find the sloping ceiling somehow makes the room cozier, gut zum Kuscheln 🙂
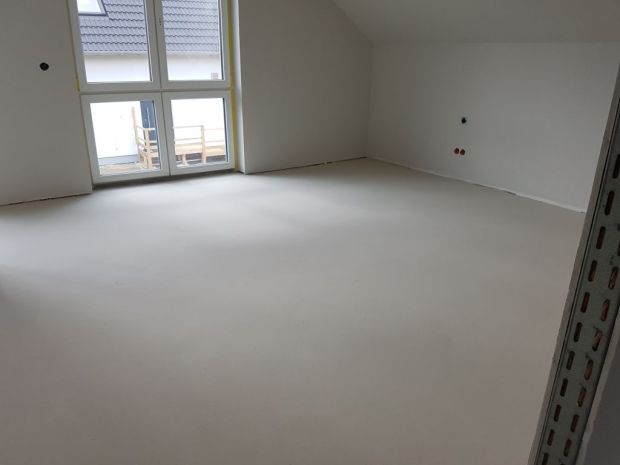
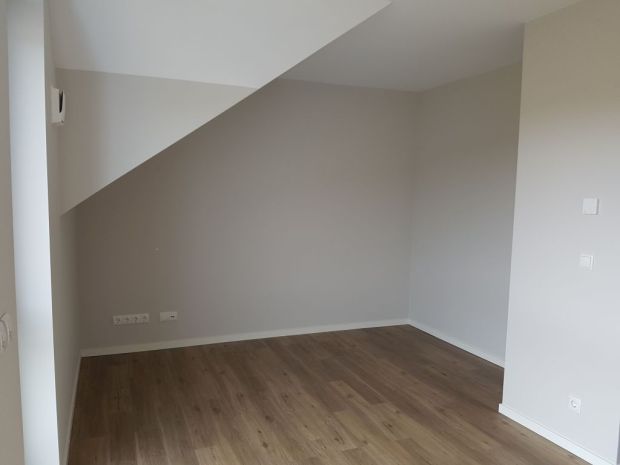
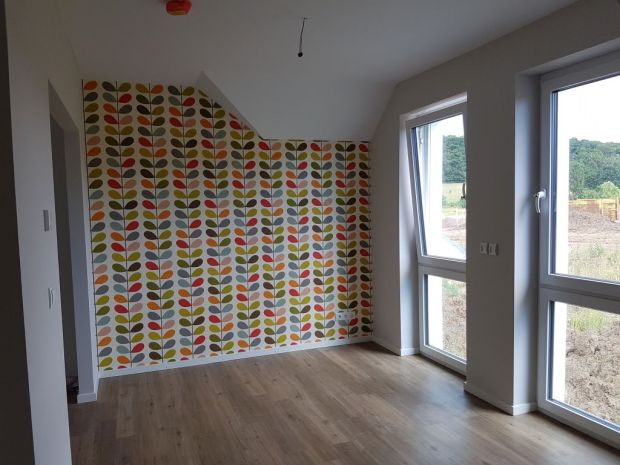
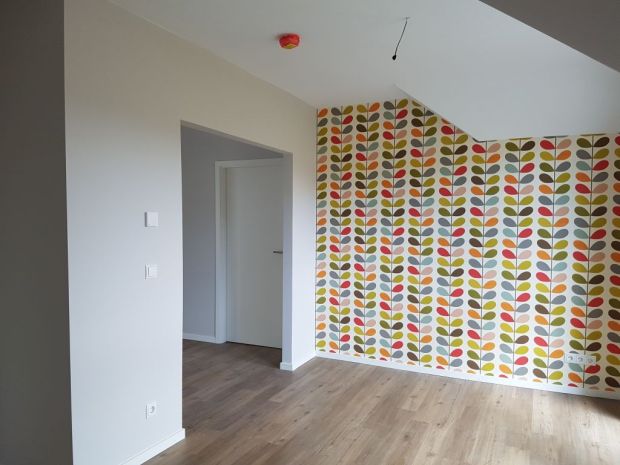
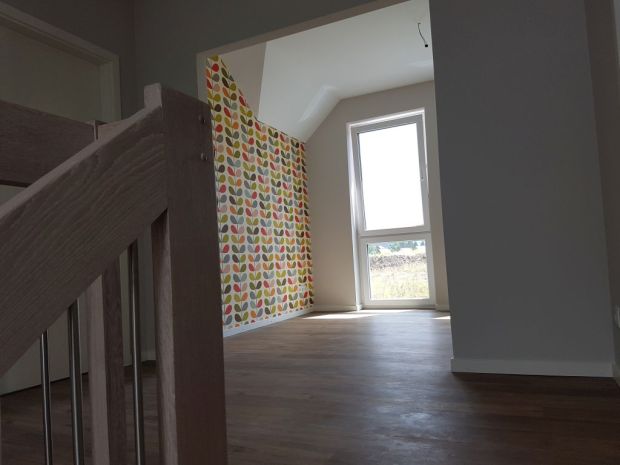
Guest room3

Office/Hobby Room

This is the room where the wall dormer is so here we’ve got extra full-height floor space. Because it’s a gabled dormer, not flat-roofed or a shed type, we ended up with some interesting shapes in the ceiling like the one you see on the right. I like it a lot though. It looked almost sculptural specially after it had been painted. That corner is going to be D’s space, which is all the space he’s getting in this room 😀

Office 4

Directly opposite D’s corner is a recessed wall, which is meant to exactly fit a 2-meter wide, full-depth IKEA-PAX. This is the corner that I painstakingly configured in the floorplan when I was doing it, because I want the cabinet to be flush with the wall.

Office 2

You see we left the entry to this room open to allow light from the south side to stream through to the upper floor landing.

Office 3

Now this is my side of the room, where I have my bit of Orla Kiely. After ditching the multi-color scheme, I decided a wall in the upper floor should at least be fun. I fell in love with this vibrant retro-print a long time ago. It’s one of those things that makes me smile everytime I see it 🙂  I’ve considered several other patterns like the Woods-series by Cole and Son but I keep coming back to this. It must be true love 🙂  Unfortunately D is not in love 😩 This wallpaper will now dictate my styling and accessorizing…at least color-wise.
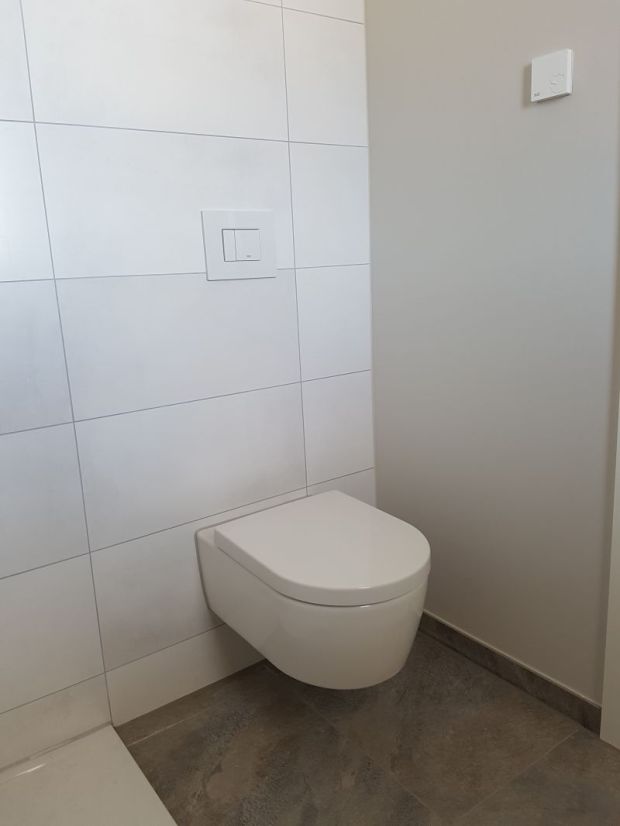
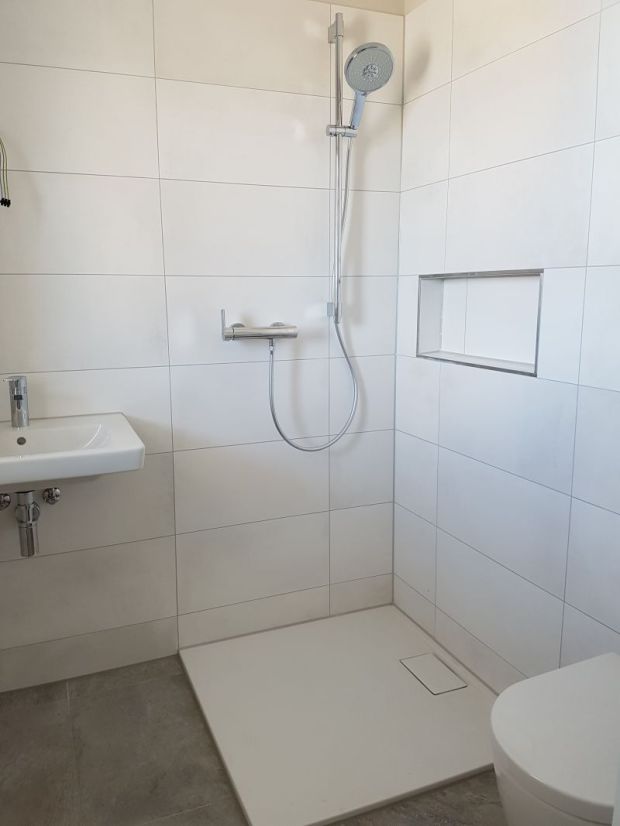
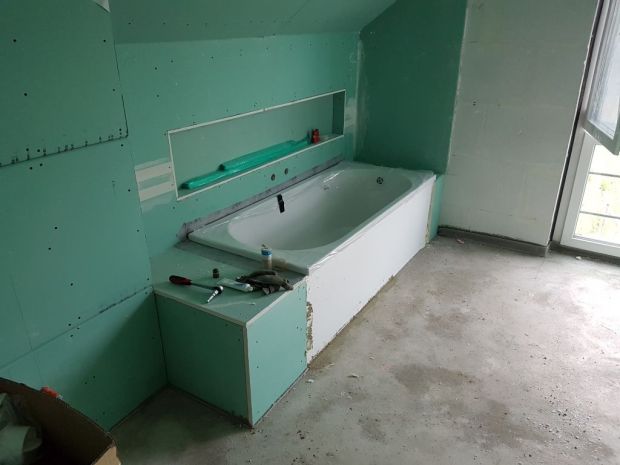
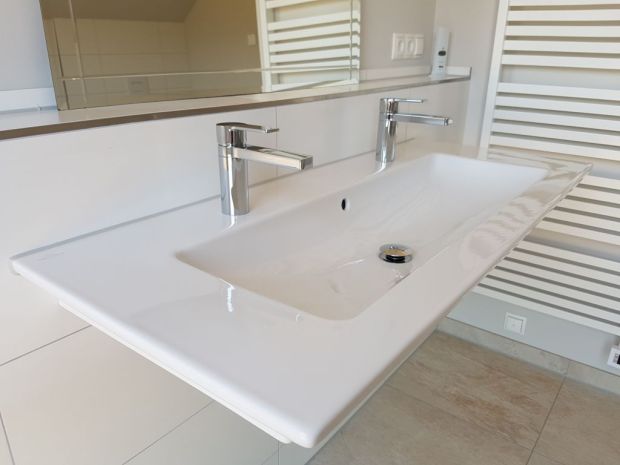
Office 5

Office 6

Main Bathroom

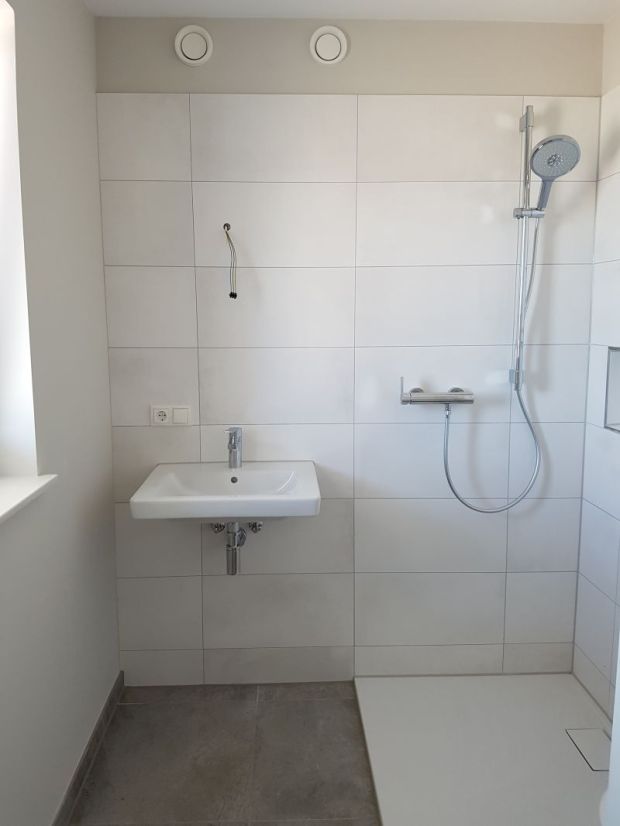
I love, love, love the bathroom. It worked out exactly like how I imagined it. The room is bright, warm and inviting. It gives off all the feeling of comfort and relaxation that you’d expect in a bathroom. I just can’t express enough how happy I am with the outcome here.

Bathroom1

Bathroom3

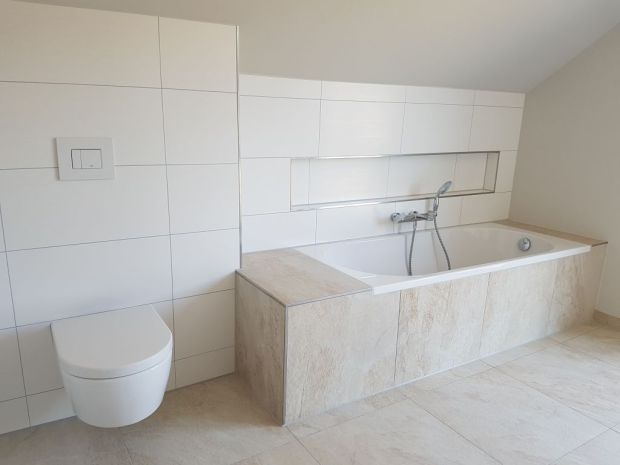
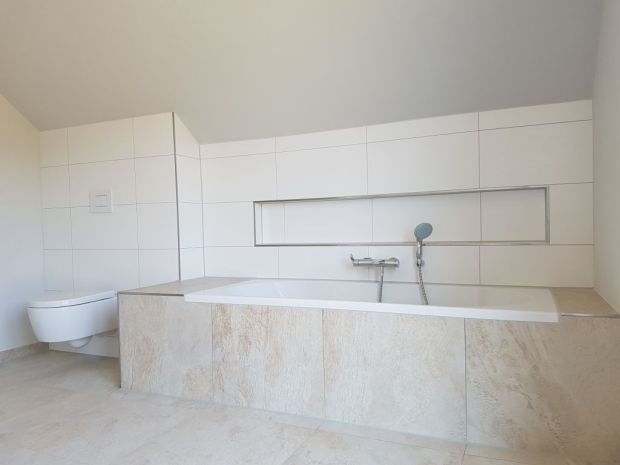
Tiling was great. I’m happy that we’ve reconsidered the white grout on the walls, as the tiler said there’s no way I’ll be able to keep it white. He suggested a light gray, which worked out great with the tiles. He also had all corners hemmed with a stainless steel strip. I initially had misgivings about this as I feel it’d be too much stainless steel. I only wanted the niches framed and the vanity ledge but that’s it. But he said they’re really meant to protect the tile edges since the tiles are the calibrated type. I don’t know what other types there are but if it’s to protect them, then by all means seal all the edges.

Bathroom9

Bathroom6

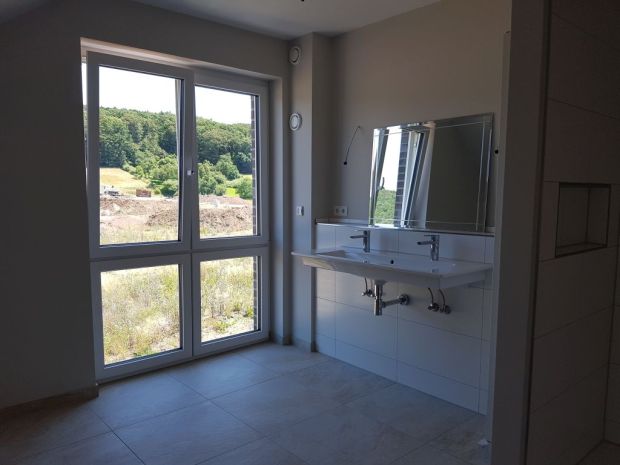
It’s hard to capture a nice photo from this angle because of the glare, but you see how abundant natural light is in this room. I like that we have the vanity next to the window. Great for putting make-up on 😉

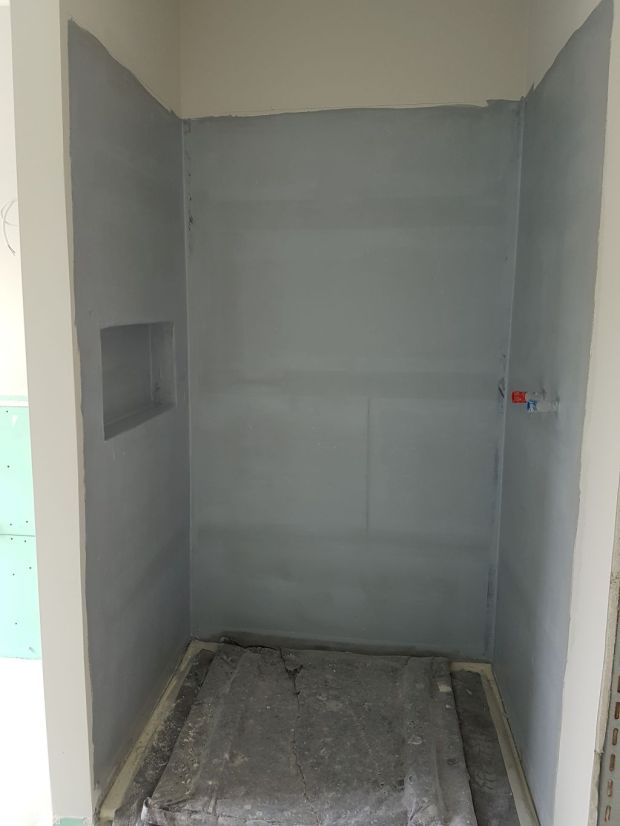
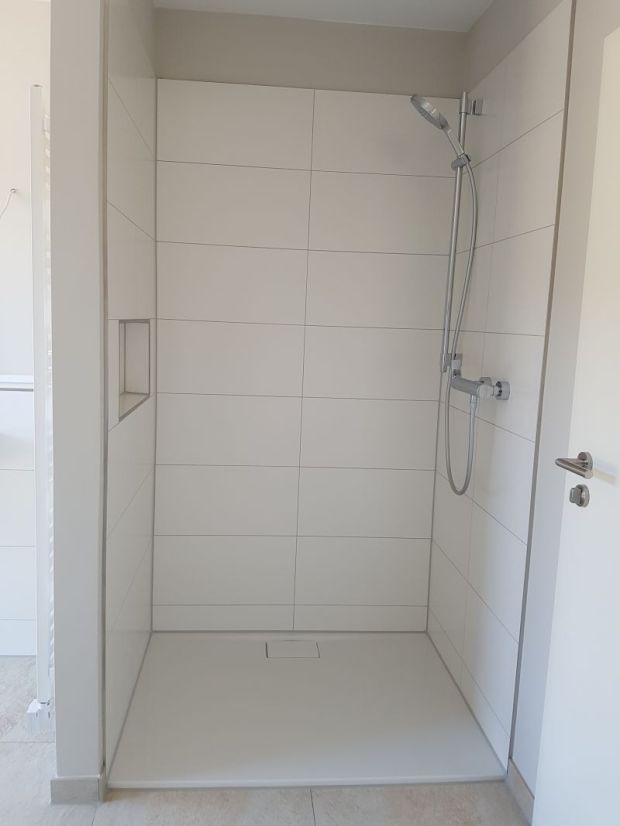
This is from the other side, where you see the shower.

Bathroom2

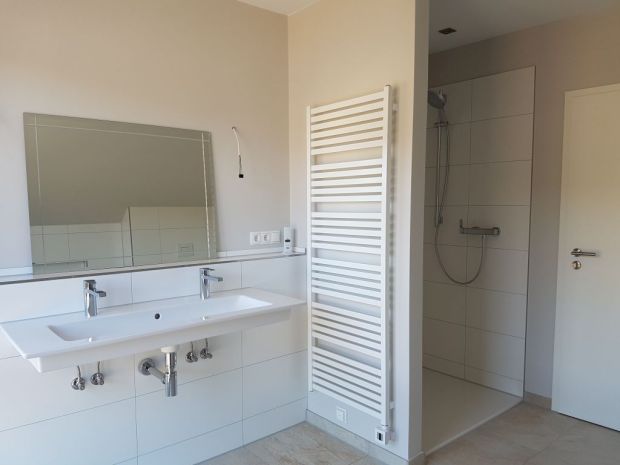
Glass door is still missing.

Bathroom5.jpg

You’ll see that my tiling plan here had been wonderfully executed (if you compare it with the initial rendering). I didn’t even have to explain anything to the tiler. He already knew how I wanted it done, except for the tile moulding around the ledge which I don’t want. Again he persuaded me to have them so as to avoid dirtying the wall when I clean the ledge. Now I know, pretty is not always practical 🙂 Anyway, the mirror is an old, old one we have that we thought we could use here. It’s rather hard to reach a mirror solution here because of the position of the wall-lamp outlets. They’re not high enough and too far apart for overhead lamps. I think they meant for us to buy one of those washstand mirrors with integrated LED light strips on the sides. Not that they’re not to my liking, they’re just too expensive for me, at least the ones I like. So for now, we’ll try to find a temporary but pretty solution.

Bathroom8

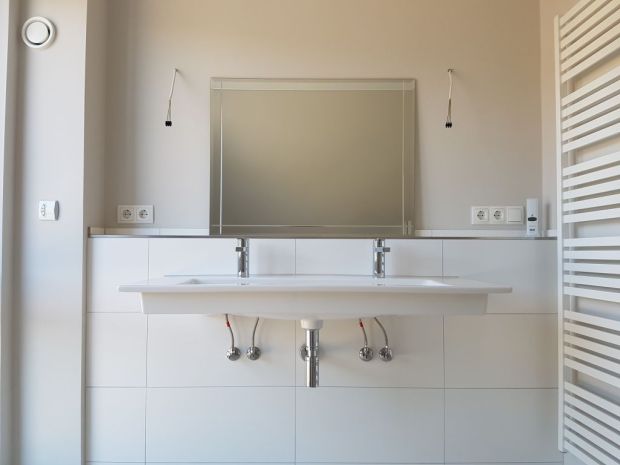
Sorry I’m still going to go on with my bathroom loving 😀 Because I really love the vanity. The basin doesn’t look very deep but water doesn’t splash out of it even with the taps off-center. Also at 120 cm wide, there’s plenty of space for me and D for our daily ablutions, which we do almost always at the same time. The taps I like a lot too, except they’re jutting a bit too far out in front I think. Aber macht nichts! Now just the vanity unit and bathroom accessories.
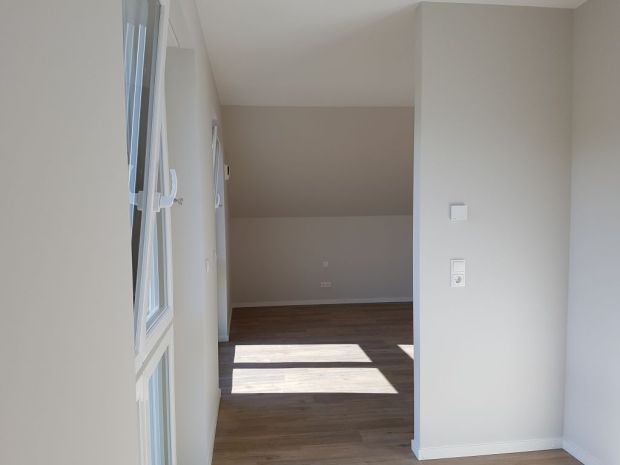
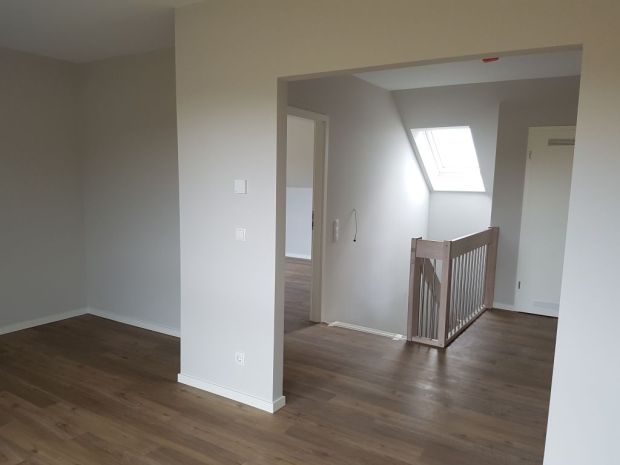
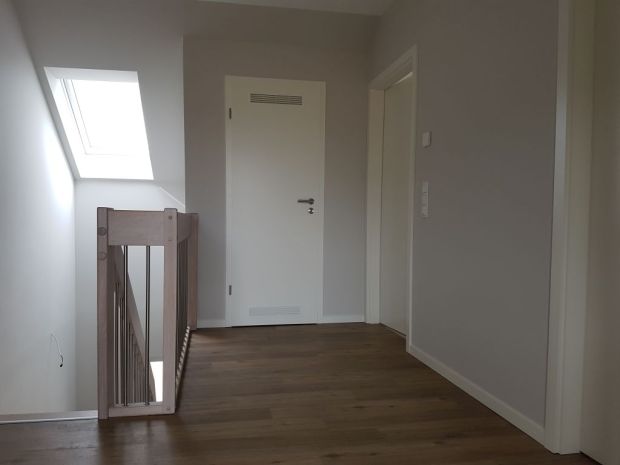
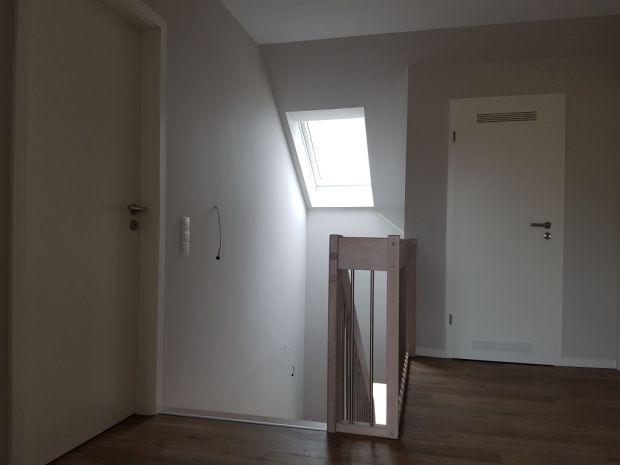
Bathroom4

Upstairs Hallway

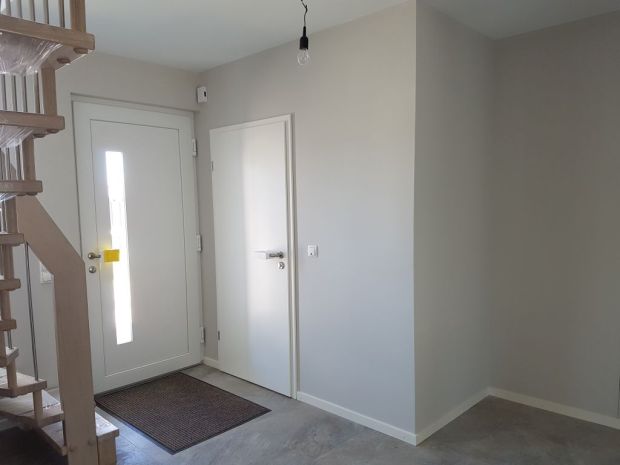
This is what you’ll find upon reaching the stairs landing. So I like that immediately I see something that makes me happy 🙂

Office 7

The left-most door is to a small storage room, then bathroom and on the right to the guest room.

hallway1

hallway2

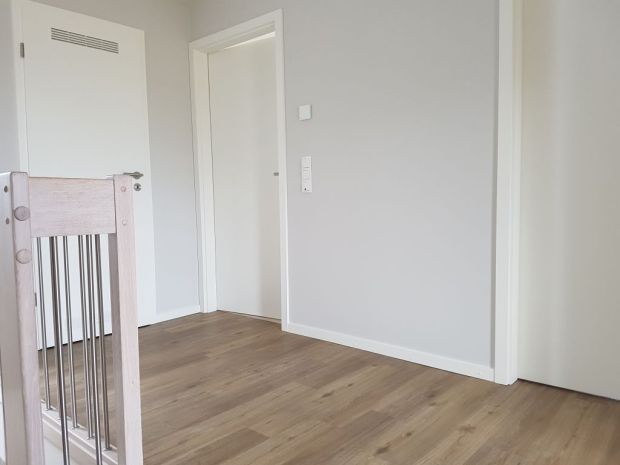
The door on the left is to our bedroom.

hallway4

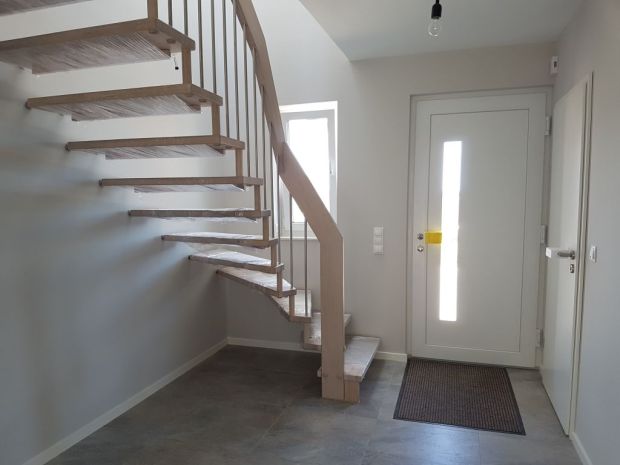
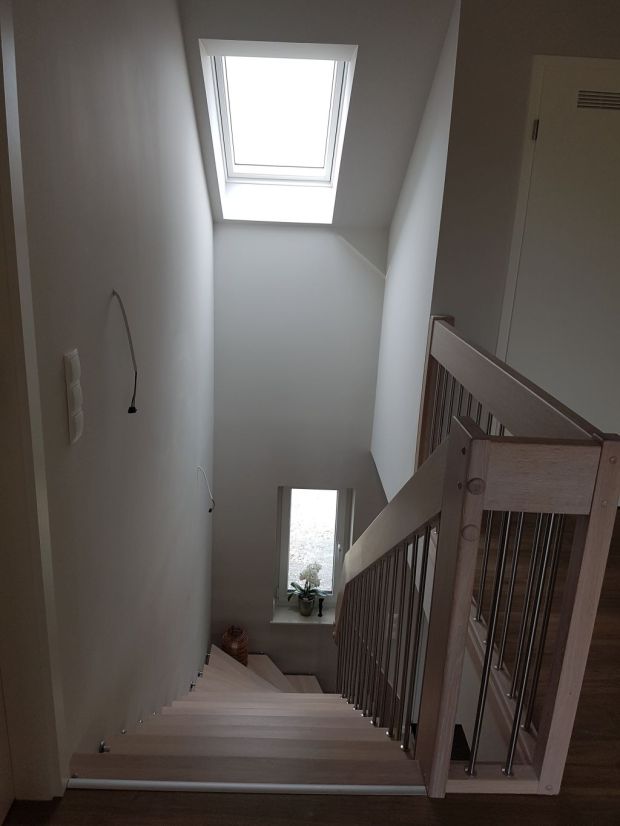
Lastly from the top of the stairs. You see here that the stairs and the floor are not matchy-matchy, but it’s really not very bad. This is already after we’ve moved in as evidenced by the flower on the window sill 🙂 Maybe in the coming posts I’ll show you how we’ve furnished the house with the stuff we already have. Furnishing a house as you know is a process and for us, it may still take some time until I could say that we’ve got the feel and character we’re going for. It’s again a journey that I’m looking forward to sharing with you, as we see how each room evolves. So stay tuned for that 🙂

hallway3

So that’s it for the upper floor. I said I’ll be sharing the kitchen next but I’m afraid, it’s not yet reveal-ready. Some elements are still missing and we can’t say for sure when they’ll be done with it. For now, just let me reassure you that it’ll be worth the wait 🙂

Until then guys. TschĂŒss! 

Das Haus: The Reveal – Part 1

So dear friends, das Bauprojekt has come to a close. They really did finish in only 11 weeks 😀 Kaum zu glauben, oder? It does feel like only yesterday when the concrete foundation had been poured and now the house is ready for move-in! What a truly spectacular ride this project had been. And not once did we feel overwhelmed or unduly stressed by it. We owe it all to the brilliant Handwerker, whose works I could only describe in superlatives. Specially our Engineer, who had been key to all these. If not for his magnificent orchestration, this project would not have progressed the way it did and turned out as splendidly as we hoped. I know I promised this post will be about the finished product. Please note, I’m not claiming any sort of grandness as is often associated with “reveals”, so temper your expectations 🙂 I only wish to share with you the end result… and naturally, my utter delight in it 😉

Shall we get on with the walk-through? 🙂

Entry

This is what you’ll see upon entering the front door. I think it’s a good enough-sized entryway, bright and airy. Overall, a welcoming space if you ask me 🙂 I am very happy with the staircase. It’s one of the few items that we’ve upgraded. But I never really knew how it’s going to look like until it had been installed, as we chose this based only on a slab of wood. Anyway, it’s solid oak, white-waxed. This we chose over the standard birch or beech, which are also pretty but not really doing it for me. I was hoping that the wood finish will match the flooring upstairs but it didn’t. Nevertheless, I’m still happy with our choice. It is really lovely in real life 😉          

Entry 1

This is from the other side. I appreciate that the staircase is somewhat filigran, sturdy but delicate-looking. It didn’t really hog the space here at the entry. The open risers and slender stainless steel railings allow transparency, for light to filter through to the room and for air to circulate.

Entry 3

The door on the left is to the guest bathroom. Then next to it is an alcove which I’ll enclose later with double glass sliding door to serve as cloakroom.

Entry 2

The space under the stairs may be a good spot for some styling in this room. I’m thinking about putting a console table here or a wall-mounted commode, maybe accesorize with mirrors, lamps, plants etc. I’m afraid though that that may happen much, much later. In any case, I’ll be sharing with you my ideas and inspirations and of course, if and when I do implement these ideas, I’ll make sure to update you on the outcome 🙂

Entry 4

Guest Bathroom

This is but a tiny bathroom, not even 4 sqm. But we managed to squeeze a 90 X 90 cm shower stall in the corner. Glass shower enclosure had already been measured but installation may still take a few weeks. The opening to the shower could be a bit problematic because they have to fix 2 glass slabs on either side, next to the vanity and the toilet, to avoid collision with the fixtures when swung open. We agreed to have 45 cm glass slab fixed and the other 45 cm “swing-able”, allowing about 60 cm opening in the corner. So it may be a bit tight.

WC1

The toilet corner is also rather tight. But I thought this should do for a guest toilet.

WC2

I love how the tile combination worked out here. It’s hard to see but the wall tiles have this subtle concrete-finish effect. They’re like smudgy white tiles, but smudgy in a pretty way. I also like the stainless-steel framing of the shower niche.

WC3

Living/Dining Area

From the entry, through the double-door, you’ll find the dining area. It’s the longer side of the room. Since it’s also narrow, you can easily guess the only table situation that could possibly work here.

Living room12

This is the dining area from the other side of the room. The double pocket doors in front leads to the kitchen. These however are not our doors. Unfortunately, they installed the wrong ones. They’re supposed to be the same as the double doors at the entry (the ones you see on the left) with the glass panes. While we’d decided to barricade the kitchen, we still want the see-throughness of open kitchen plans. I feel the glass panes will somehow allow that, although I suspect we’ll most likely keep these doors open anyway.

Living room7

The dining area from the living area. Here you see how bright the room is, just the way we want it. But as I walk around this room, with so many big windows, I can’t help but feel a little bit “exposed”. I’ve really got to get on with the drapes…and soon! It’s good we have shutters!

Living room5

Anyway here you’ll get a better view of my curious color choices 🙂  I didn’t really go crazy with the paint colors, although I initially considered using several bright ones as accents.Yes some people may say, accents are so yesterday and that it’s the era of pastels and soft tones. But I love bold colors and I want something exciting. However, instead of having several colors – the idea was for each room to have an accent, not really diverging colors but just nuanced palettes of blues and greens – I chose one and I zeroed in on this blue. Unfortunately, the blue you see here is not the same in person. It’s a deeper blue, with a touch of green, similar to a color they call here petrol. I had it painted on this wall all the way to the kitchen on the other side. The rest of the walls are painted in a warm gray, with a touch of ochre, very mother-of-pearl-ish. I’m really happy I didn’t go for this multi-color idea.

As for the paint finish, I chose flat, matte finish. My mom warned me against it. She said it’ll easily soil and I fear, she may be proven right. I already see blemishes here and there, although the painter said it should be easy to spot clean with a soft damp cloth, plus the paint is formulated to contain some kind of a dirt-repellant. I’m not too sure about that though, so we’ll see. I just happen to love the velvety texture of the matte finish. And since it doesn’t reflect light, the colors appear to me deeper and fuller.

Living room3

This is the living area. If you remember the houseplan, it’s the shorter leg of the L shape of the room. Now here you may appreciate the floor tiles better. I feared in the beginning that it’s going to be too dark once laid out on a bigger surface. But apparently not. The browns on the tiles adequately balanced the grays. Overall, I love how it turned out. I feel the wall colors also tied in with the tiles beautifully.

Living room2

Here you may see it better, although still not the same IRL. Now just want to say that our tiler is truly the best! Would you believe the whole tiling was just a one-man job? And he finished all in just 4 days, and excellently too! He did limit the grout in between tiles to maximum 3mm as I requested and all grout lines are as straight as they could be. Layout was also superb, without tile cuts along the expansion joints. I couldn’t be happier 🙂

Living room13.jpg


This is the view of the living room from the dining area. We have here another set of big windows. Oh gee, how much fabric do you think I will need for the windows here? I’ll go DV shopping when I get home 😉

Living room9

Sorry guys 😩 I could only do a partial house tour today. But we’ll move on to the upper floor in the next post and then the kitchen and utility room.

Until then! Hope you stay tuned 🙂

Das Bauprojekt: Update


Guys sorry I have been remiss with the updates. The past 3 weeks had just been a crazy flurry of activities, we could barely keep up, although we drive to the site almost everyday now. Anyway I thought today I’ll fill you in first on the works done before the finishing touches. I meant before the painting, tiling, sanitary installations and door fittings. So mostly boring stuff. I realized it would be more interesting to show you the finished output instead, in order to appreciate the space before any manner of styling is infused. So here goes:

Wall Finishing

Similar to the floor paving, the wall finishing had been done in a less conventional way. Most of you probably know how finecasting is done, where cement mixture is either sprayed or applied on the wall and then smoothed down to a Baby-Po surface. Instead of that, here they’d glued pre-casted plaster boards on the wall like you see on the photo. I’m not sure how different these boards are from the sheetrocks they’d used for the walls upstairs, but they look very similar. The only interesting thing is that this was one particular job that had not been contracted out by Viebrockhaus. It didn’t appear to me that “involved” requiring any special skill but maybe there’s a secret somewhere that they want to keep exclusive 😉

wand 1

Here is after the seams had been smoothed and spackled, ready for priming.

wand5

The same treatment had been done to the bathrooms.

wand4

Additionally to the particularly wet areas in the room such as the shower, a liquid sealant had been applied on the wall. This in preparation for wall tiling. One interesting thing I’ve observed from the very beginning is that singular attention paid to sealing. Compared to building techniques I’ve seen on various blogs and forums, this preoccupation seems to me sometimes overmuch. But then, problems of water leakages were never really pleasant nor cheap to take care of, so I suppose these are instances when there’d be no overkilling it 😉

wand7

Floor Finishing

This is only done upstairs, in preparation for the laying of the vinyl planks. I initially thought that they would just be glued directly on the floor. Although they said you could do that, but that it won’t stay put very long. The surface needs to be super-even, possibly without airpockets or any way for moisture to creep in as those will eventually loosen the hold of the glue. So the concrete surface was first treated to a thorough vacuuming and then sealed and primed. After which, a thin layer of very fine cement/plaster mixture had been poured and then leveled with that implement you see on the photo.

wand12

After a few hours, it dried up into this.

wand13

Utility Connections

Of course, a house won’t be functional without utility services. So finally, they had our house connected. You see here that it’s quite some distance from the road where the pipes are to our valves.

wand8

I don’t know what the other pipes are for. But we only need these 3.

wand11

Solar Panel Installation

You know this thing that gets D shaking in his boots. We were expecting these installed already before they took away the scaffolding, but they’re delayed. No matter, at least now they’re there. I just worried a bit about those tiles. I hope he replaced them correctly.

wand9

There are 2 sets of these. One on either side of the wall dormer. And aren’t they a beauty? I couldn’t commend Viebrockhaus enough for their aesthetic considerations even for banal and practical stuff like solar panels 🙂 I don’t know if you notice, but these panels don’t have the characteristic blue-ish checkered patterns on the surface. Not that they matter so much but may still irritate me a little bit 😀 I love that these blend more harmoniously with the roof tiles.

Just for your info, these are Sunpower X20 solar modules with 335 Watt power output per module, which is 33% more than conventional panels. Also, the SunPower Maxeon Solarcell-Technology used in these modules allows energy absorption even in bad lighting conditions such as when it’s cloudy or rainy which unfortunately is more the case in our region. These are advertised as one of the best modules out there right now, so that may interest some of you.

wand10

OK so that’s it! Like I mentioned earlier, the next update will already be the finished product 🙂 which won’t be long now. Because you know what? it looks like everything will be done 1 week ahead of schedule!!! It’s already quite impressive that they promised delivery in 12 weeks. But in even less than that?!?! If that doesn’t knock your socks off, I don’t know what will 😀

Das Bauprojekt: Weeks 6&7

Work mood was kind of laidback in the last couple of weeks. Week 6 was again a short week because of a holiday, observed in all BundeslĂ€nder except Lower Saxony!! Our contractor happens to be from Nordrhein Westfallen so egal where their work is, holidays apparently always apply. Week 7 was a regular week, but still it has not been as action-packed as in the weeks before. I kind of feel that we’re now entering the wrapping-up phase. And just about time too. Can you believe it’s already June?!?!? And we’re already half-way through to the Endabnahme?!?!?

So here were the happenings these past 2 weeks.

Dismantling of the Scaffolding

Let me start with this, although they only did this on the last day of Week 7. Here again are some photos of the house, this time without obstructions 😉

14

18

15

Floor Heating Installation

As for the main works, they’d now moved on to the setup of the heating system. Having heated floors is perhaps our most favorite thing about the house. Beyond the fact that I won’t suffer cold feet anymore, I’m happy that I don’t have to see another ugly radiator in the house. Oh I forgot. There’ll be one in the main bath, but it’s a bit fancy-ish so that’s OK 🙂

To prepare the floor for the heating pipes, a layer of polystyrol insulation had first been laid out on the concrete base. It’s about 10 cm thick on the ground floor and 6 cm on the upper floor. It’s not a dense material, so it’s kind of springy. I know this functions mainly as barrier against frost, in addition to the insulation already integrated in the base plate and a sound absorber, I guess, to minimize the clacking of heels. But who does wear heels inside the house?!?! But more than that, I’d like to think that this also somehow acts as some sort of underfoot padding to relieve stress on our poor joints especially when walking or standing barefoot on the surface.

1

So areas with large pipes had been carved out and filled with a granulated filler.

3

Then on top of this layer is  another layer of foam (about 3 cm thick) overlaid with some kind of foil you see here on photo. This is the living/dining area already laid out with radiant pipes.

12

And the guest room upstairs.

5

You’ll notice here in the bathroom that the coils had been more densely laid out. This is partly to compensate for areas without floor heating, namely shower and tub. Also because sleeping rooms were meant to have a cooler climate than bathrooms.

6

All these coils were then connected to the heating circuit distributor. There are 2 of these: one on the ground floor and one on the upper floor (here hidden in the storage room).

8

“Paving” of Floors

After the laying of pipes, a layer of screed (aka palitada) had been piled on top. The screed is a conventional mixture of cement and sand, to which a special compound was added to replace the usual amount of water used to bind. So you’ll notice, it’s more crumbly than the wet mixture we’re more familiar with. The main objective here is to use as little water as possible to minimize condensation inside the house. This kind of “dry” construction is a technique that had been extensively researched by Viebrockhaus over the years. Even the laying of foam underneath is part of this system, resulting in this floating floor construction they’re doing here.

9

These piles of screed were then leveled to a smooth surface like this. This is now the last floor layer before the final surface material i.e. tiles, vinyl planks etc.

10

Drying of this layer is very important and all moisture has to be sucked out of the house. We don’t want moisture lingering within because as we know that would encourage the growth of unwanted flora on the walls. So for good measure, we’re instructed to air the house (windows wide open for 30 mins to 1 hour) twice a day for about a week. And even after moving in, it’s recommended that we air the house regularly for a year, even with the ventilation system.

So counting all layers, we come to about a 20cm thick floor plus 24 cm baseplate including all insulation.

Grouting of the Brick Facade

I never realized, from an aesthetic standpoint, how important the grout is. It’s not a few times that we were asked what the grout color is going to be. It’s a bit disconcerting because I don’t remember ever discussing this with our consultant before. She just said, it’s going to be gray. But what kind of gray?!?! Now I realized, if it’s not the right kind, then the entire facade is going to be “ruined”, considering how much I like the bricks!!

Add to that the suspense of the “missing” grouters. We knew the scaffolding would be dismantled on the Friday of week 7 so they really had to have this done before then. Week 7 was already drawing to a close and grouters were still MIA. We called the Engineer but he said if they don’t do it as scheduled, they’d have to set up their own scaffoldings. And Gott sei Dank, they showed up last Wednesday and finished the thing in half a day. But then I thought, wasn’t that a bit “too” fast? So I checked as soon as and this is how I found it…up close.

20

For a more complete view of the effect, please see photos of house above. Overall, grouting was OK. Some parts were a bit schmierig but I think these will still get a face-wash later anyway. As for the color, yes it’s gray. I think it’s mittel-grau. But when I saw it, I thought it could be a tinge darker. The thing with grout though is that the color also depends on the moisture content. So let’s just say, I like it better when it’s wet.

Others

The guys doing the heating will also be doing all sanitary installations later. So last week, they’ve finally delivered and setup the tub and shower trays.

21

Here’s the shower stall in the main bathroom. I love the shower trays. They do feel solid and sturdier than I imagined. Somehow I’ve always thought them flimsy because they’re made of acrylic. I mentioned before how I liked the enamelled variant better for their durability and scratch-resistance but I know they’re also more expensive. That’s why I settled with these. But now that I’ve seen them, I’m quite satisfied 🙂

22

Overall, everything seems to be coming together nicely. But somehow, I’m also increasingly becoming more tensed, especially now that we’re about to start working with the surface materials. Tiling will begin next week and painting the week after. Tiles as you know have already been picked. Paint colors have just been recently decided upon. Just hoping now that they’re going to work out like how I visualized them in my head. D is hugely skeptical about the pink, but he said he trusts me 😀 I may talk about that in another post. For now, let me end here.

Das Bauprojekt: Week 5

We saw since since week 1 how the house construction has progressed in a smooth and steady cadence. It sometimes makes me wonder if there’s ever going to be a crescendo, when always the works are in full-blast 😉 Anyway, the house interior is now taking shape, upstairs in particular. All electrical wirings were also fertig. So now to account for the works done this week:

Drywalling

This is probably the major accomplishment this week. Last week, I already showed you the beginning of the metal framing for the rooms upstairs. So the Trockenbauer took a total of 7 days to finish all the upstairs insulation, room partitioning and drywalling. Let’s begin with the bathrooms 🙂

These are the bathrooms upstairs and downstairs. Before the drywalling, the wall-panel frames housing the toilet tanks had first been setup by the sanitary Installateurs. The toilets are wall-mounted so the water tanks would be walled-up together with the water pipes.

2

1

These are after they had been walled-up, now ready for sealing and tiling. They used a special sheetrock here intended for damp areas such as bathrooms. These boards are about 15 mm thick and are supposed to be impregnable. The niches on the walls had also already been framed. Now I understand why it cost extra to have these niches, because they did require more fiddly work, which I suppose would be the same for the tilers later on.

14

15

I just had a bit of freak-out moment with the installation for the vanity (pictured below). If you recall from my post about the bathroom, I have my own tiling plan for this area and I need the wall installation to recede a bit from the casing for the exhaust pipes. In the drawing, they have it leveled with the vanity panel wall, as in the original rendering of the bathroom.

17

Anyway, it’s good that we managed to communicate this before they’d walled this up. Engineer just checked if this could be done because there’s really not much space on the wall next to the window. But he confirmed that it’s machbar, so now I’m happy 🙂

16

As for the other rooms, you’ll see here (guestroom) that they had the metal frames stuffed with insulation, which I think is also partly for sound absorption. We worried at first, since the walls are not solid concrete, that we’ll hear through the walls but obviously they’ve already considered that. Sound absorbers/insulation will also be laid on the the floors.

4

After which they had been boarded up. I think this is pretty much it for the walls upstairs. They just need to seal and smooth the seams and they should be ready for priming and painting.

18

Just this one here is a bit of an irritation for me – the skylight not being centered. I already noted this before in the plan and discussed it with the Engineer before the roofing began. But he said, “no can do”. It has something to do with the spacing of the rafters. But if I insist, it would cost me an arm. And as you know, I easily scare when one talks to me of damages. At any rate, I’m happy that we decided to add this. It really brings a lot of Helligkeit into the room, though it would be quite tricky to clean. 🙂

19

Laying of Pipes

Apart from the wall-panel installations in the bathrooms, the Installateurs had also laid the pipes for water/wastewater (here in gray foam covering).

7

You’ll notice here that not all water pipes are wall-mounted, like this one here for the kitchen sink. I think all pipes that could be concealed behind cabinetry are made so. The pipes in the bathrooms, however, are all flush-mounted.

9

Exhaust pipes had also been configured here on the ceiling (of the utility room). Unfortunately, these are going to be exposed. I wish they could be prettier but these are what they have. It’s good however that these are confined to the utility room!

10

All these pipes, both for water and exhaust air, are integrated in the house’s heating system. This fridge-looking box here is the heart of this heating system and partly also the ventilation system, which I’ll talk about in another post.

11

Exterior Wall Rendering

Lastly the white stripes (non-bricked exterior walls) in the back and front of the house had just been rendered. Here’s the one in the back. We thought they won’t be painted over until next week but we were there yesterday and it looked like they already did. Unfortunately I don’t have a photo of painted facade, but it’s very similar to this…just whiter.

12

The masons were also back for a day to do the rowlock sills. It’s the bricking of the exterior window sills as in photo below. Sorry I don’t have a proper photo. This is just cropped from photo above.

21

So that was it! Next week will be the wall finishing on the ground floor. Installateurs will also be back to start work on the floor for the laying of the radiant heating pipes. So until next week guys!

Das Bauprojekt: Week 4-Part 2

As promised, I’m back with report on the rest of week 4. So Thursday and Friday had been dedicated to the cozying up of the upper floor, readying it for room partitioning and drywalling. But apart from that, a bit of drywalling had also been done downstairs. This is the doorway to the kitchen from the dining/living area, here being framed.

Drywalling1

I didn’t realize how thick this wall is. The additional walling for the pocket doors ate a lot of wall space next to the big window in the dining area. I worry a bit about the curtain situation later. Anyway, we’ll see 🙂

Drywalling2

Upstairs: remember before this, there were only the rafters and beams. So the walls and ceiling had been stuffed with insulation.

Insulation1

I think it’s about 20-22 cm thick judging from this photo. It is the same material sandwiched between the inner shell and the brick facade in the ground floor. It is thicker here because next to this is just going to be the drywall.

Insulation2

But before the drywall, it had been sealed first with this special foil, to prevent moisture from creeping into the insulation and I guess, vice-versa. I may have spoken too soon about the house being able to breath through the walls. Because it’s certainly not the case here. So part of our house is actually wrapped in plastic!!!

Insulation3

Friday, they’ve battened it up. Now the upper floor is ready for the electrical wiring guys.

walling4

They’ve also started the metal framing for the rooms. This side is where the bathroom and guest room are going to be.

walling3

Speaking of wiring, D did a little bit of wiring on Thursday. We decided to add recessed lighting along the underside of the eaves in front (pictured below) and back of the house. We have several exterior wall lamps planned around the house but then we realized we only have one in the back.  Considering matters of symmetry and such, I found there’s no space on the wall to put a second lamp. So I suggested recessed lighting under the eaves. However, the electrical people are not coming back until Tuesday (Monday is holiday again!) and by that time, the eaves would be boarded up already, so D offered to lay out the wiring.

Wiring 1

So here’s the eaves’s underside that had been sealed with the horizontal soffit. Now we just have to drill through these boards to get to the wires.

gesims1

These will still get a couple of coats of paint but I’m afraid, we will have to paint them again at some point. We were given a choice before between real wood soffit boards or plastic, which wouldn’t require any repainting. We chose wood of course. Though I’ve seen the plastic… they’re really not bad to look at, to be honest. But I was second-guessing the combination of plastic planks and the wood rafters here at the front entrance. That would not have “worked”, don’t you think?

Oh when I talk like this and about these things, I’m fueling D’s accusation (and some other peeps) that I am “anal-retentive” 😀 That’s the word. Not even “perfectionist” or “stickler”!! Well maybe I am 🙂 … but I’m convinced we should be anyway, especially when it comes to projects like this, which we get to do once in our lifetime, if at all. Oder? 🙂

Das Bauprojekt: Weeks 3&4-Part1

I didn’t do a Week 3 update anymore because there’s really not much to report. After all it was just a short work-week, Thursday being a holiday. The bricking however had been completed. It’s just the grouting now and rendering of the facade. We expected for the windows to be installed on the Wednesday before the Ascension, but it was canceled and moved to Monday. This on top of a choc-a-bloc of other activities already lined up for Week 4. So here’s a partial rundown of the works accomplished this week.

Window Installation

Windows and the shutter casings had been installed on Monday. Here’s a view on the west-side.

Windows 4

About them windows, I can only say that I am VERY happy with our choice 🙂 I’m glad that we didn’t go for the dark frames. I think the white frames contrast very nicely with the dark walls, while also echoing the stripes of white render in front and the wall dormer in the back. To think that my only motivation for staying with white was because I’m a cheap-o and didn’t want to pay extra for color-lamination. So  I guess… I saved money for more aesthetic appeal 😉

Windows 1

Upstairs windows with the shutter casings, which will be covered with plaster later. Now I have to take care where I screw my curtain rod brackets.

Electro 3

Downstairs windows in the dining area. Apart from the kitchen window (one on far left) and two narrow windows in the foyer and guest bath (in photo below), all other windows are leveled with the floor. Now that I see them, I realize that’s a LOT of glass surface to clean. Argh!

Door 1

Front door (pictured here) and side door had also been installed, meaning the house is not accessible anymore to the Neugierig 🙂 Not that we mind people checking out the premises. I also like checking out other people’s houses 😀

Roof Tiling

Roof had been tiled on Monday and Tuesday. This was originally scheduled for Wednesday after the windows had been installed, I think because of the skylight. So we were surprised to find the Dachdecker there tiling away on Monday. Here’s a photo of the tiled roof in front.

Roofing 1

Here’s one while they’re tiling the back. As with the other works, it’s just hard to keep up! They are recht schnell. The next thing we know, it’s done! And always, we miss the crane 😩

Roofing 5

A closer look at the tiles.

Roofing 3

Roofing 4

I’m happy we skipped the slate sheet cladding on the eaves boards (here the white boards). If you go back to the first photo above, I love the way they framed the roof; again lending that nice touch of contrast to the dark roof (and walls). As if by accident, everything seems to be working out together seamlessly (so far). Because to be honest, I didn’t have pictures of details like these in my head when we were picking materials or deciding whether to add a certain detail or not. Sometimes we think they’re just minor decisions compared to things like the roof or bricks. But I am one who thinks that details like these make the difference… although of course they could also be the undoing of your entire concept.

Roofing 2

Going back to the roof, need I say that I love it (them tiles)? :-), me posting 3 close-up photos when one would do. I knew the first time I laid eyes on them that I WANT them. I mean I would LOVE to have them. However I also knew that they’re not in the standard package. The original are the classic corrugated tiles, which are also pretty. Just that I find these schlichter, cleaner, and more consistent with the modern vibe I’m going for. But as with all non-standard stuff, there’s always the premium to be paid. So I would’ve gladly stuck with the standard, if not for the superb haggling of dear father-in-law, who managed to get the cost of the upgrade halved. So YAY! 😀

Electrical Wiring

Electrical wiring began on Monday and will run until next week. Wiring on the first floor had already been completed on Tuesday. They’re just waiting now for the upper floor to be insulated and boarded up, then they can continue with the wiring there. You’ll see here that clusters of wires, encased in orange tubes, will run underneath the floor; while wiring for switches and outlets along with the casings already embedded in the walls.

Electro 4

Electro 2

This is in the living room. The right wall will be the TV wall so D had it peppered with lots of outlets and various other hook-ups for internet or satellite. I don’t know. D did most of the e-planning.

Electro 6

Here will be the kitchen. The wiring here was planned by the kitchen dealer, which we communicated with the electrical wiring guys. The kitchen guy, who was there Wednesday for the measurements, said wiring is as planned so that’s good.

Electro 7

This is going to be the laundry area. Well, the only place where they did something “wrong”. Actually there’s one other but I’m not going to talk about that anymore. You’ll see on the left side 2 electrical casings which are going to be the outlets for the washer and dryer. They had it wired 1.2 meters above the floor, I guess assuming that the machines will be stacked. We’ve mentioned several times that we want the machines side-by-side. For some reason, this has not been reflected in any of the revised plans so we thought they must have it noted somewhere. Anyway, this shouldn’t be too hard to correct. The only thing that will probably bother me is that I wanted the outlets above the counter to be on the left side. Exactly those that are now wired for the washer/dryer. Unfortunately, we cannot switch these anymore as they are already configured in the main switchboard. Well I suppose I’ll just try to live with outlets in the middle instead. Oh Pech!

Sorry I have to stop here. I’m already over 1,000 words. Yes I talk too much!!! So the works I described above are 2 days worth of work (Monday and Tuesday). Wednesday (yesterday) was the weekly meet-up with the Engineer who reported that everything had been done up to his standards, except for a minor sealing issue with a window upstairs. The drywallers are starting today until next week. I will report on other activities by end of this week. Stay tuned!

Das Bauprojekt: Concrete Slab

Going back now to the chronicling of the Bauprojekt, concrete slab was finally poured last week. It did not really follow the earthworks as swiftly as expected. But at least, the 3-month countdown is officially on. It is really getting more and more exciting!!

If you remember from last time, the building perimeter was prepped for the laying of the foundation. The slab guys reported their satisfaction with the preparations done by the earthworks people. I like this evaluation system they have where they are required to rate the quality of preceding works because of course, either they’ve made their work easier or stickier 😀

So before the framing of the slab, a 6o mm load-bearing polystyrene thermal insulation (the purple blocks in photo below) was laid out on top of the levelled surface followed by a layer of sealing sheets for additional protection against moisture creeping directly into the slab.

Bodenplatte 6

Bodenplatte 5

Here’s a rough illustration of the foundation construction. The change they did to this model is that they did away with the vertical insulation that’s supposed to wrap around the concrete slab. Instead they extended the insulation to about a meter beyond the corners and 50 cm around the sides (see photo above) for a continuous insulation. They claimed this works just as effectively in dealing with the thermal bridges and moisture encroachment (due to condensation), which occur most often at the junction of the walls. This compares with the structure of a Passivhaus baseplate, only instead of a 60mm insulation they put a much thicker insulation, as thick as 300mm. It follows that the U-value is also 5 times better than the minimum 60mm, just not sure if it’s only 5 times as expensive.       bodenplatte

After this came the framing. Inside the frames, two layers of steel reinforcements were laid out (here you only see one layer but there are 2), coming to about an 16 cm thick slab. If you notice the white wire on top of the steel mesh, D said that’s the ground wire which would be buried in the concrete. It’s interesting because I only knew ground wire as an extra wiring attached to electrical appliances. Well most likely because we didn’t have or knew about grounding systems.

Bodenplatte 3

All these on Wednesday. Thursday was the pouring of the concrete which they did for about 4 hours. I didn’t witness any of this in person, but D said they poured about 17 cubic meters of mixed concrete, for a total of 3 tanks the size of that one on the yellow truck.

Bodenplatte 7

After pouring, bubbles or airpockets were removed using a vibrating implement that they poked into the concrete, after which the surface was smoothed and levelled, and then covered with foil.

Bodenplatte 8

Bodenplatte 10

They gave the slab 3 days to dry, a slow-drying process prefered, without too much heat to prevent cracking in the slab. So we were happy that it rained over the weekend 😉 Right about now, they are into wall construction already which should be done in about a week. Stay tuned for the next update 🙂


Das Bauprojekt: Earthworks

I’m happy to update you guys that the project is indeed pushing on!!!! We were kind of in a suspenseful mode in the last couple of weeks, I guess in full anticipation of real action happening. The week before last, we’ve finally met with the project engineer during the land survey. The earthworks contractor was also there to confer with the surveyors and the engineer as to the kind of works that need to done etc. I sort of felt out of place, being the only woman there and all of them talking in rapid German. But thankfully I grasped enough to realize that they were in fact referring to the old plan that was not approved by theBauamt. Seriously, I could’ve smacked D in the head (sorry, I didn’t mean that:-) ). How can he not know these things by heart?!?! So I took him aside and told him that it’s not the updated plan. And indeed the guy didn’t have the updated file!

Anyway, on that day they did the measurements and fenced the perimeter that is to be planed and excavated.

Erdarbeit1

The earthworks guy unfortunately could not confirm when exactly the excavation is to start as there’s also the Easter holiday coming and they’re supposed to be on holiday the week after that. So we’re not expecting for actual works to start until this week. But (surprise! surprise!) we got a call last week informing us that earthworks are to begin on the 30th and should be done in 3 days!

Here are shots of the progress during those 3 days.

Erdarbeit3

Erdarbeit4

It was a lot of soil. I think they’ve trucked away about 150 cubic meters of soil. You see a bit here that they’ve dug almost 2 meters deep into one side of the property. They’ve left the topsoil (that pile on top of the photo) for us to use later for the garden.

The canalization for drainage and rain/wastewater wasn’t part of the original contract but we’ve decided to engage the same contractor to do the work, so it’s just one go. They’ve dug the drainage (with the blue pipes) around the north, south and west perimeter, to prevent the water from the elevated yard space from creeping into the base plate.

Erdarbeit6

Alongside the drainage are the separate pipes for rain and wastewater which were then connected to inspection chambers. Every house is to have these chambers before they are to be connected to the city wastewater system. All these on day 2.

Erdarbeit11

Erdarbeit9

On day 3, the canals were filled and leveled and the perimeter surface planed and compacted.

Erdarbeit12

Erdarbeit16

You can see here how high the house elevation is going to be from the road. This does not include the base plate, the construction of which is still not confirmed. They said next week on the 11th, but we’re hoping that they’ll begin later this week. We’ll see.

Erdarbeit14

After compacting, they’ve poured this gritting material (fine rock chippings) over the surface which was then covered with plastic foil until it’s ready for the foundation construction. I’m not sure but I conjecture, this kind of serves as drainage for the foundation plate and perhaps protection against frost.

Erdarbeit15

Erdarbeit18

We also had the driveway prepped with compacted gravel. It’s hard to see here, but it’s rather steep. It’d be like driving up a street in Baguio. Or maybe not that steep, but we need to do something about it.

Erdarbeit17

Another problem that I see now is the patio/garden situation. If you noticed around the excavated area, especially on the southwest corner, where we plan to have the patio, there’s roughly over a meter of unleveled soil. How disgreeable that’s going to be, coming out into the yard and right there, you face a wall? Anyway, we’ve consulted a friend of D’s, who is in landscaping business and he said, we might have to shave another 50 cm of topsoil around the property, roughly another 100 cubic meters of soil. Hmmm. Not exactly comforting especially for the pocket which is, to be honest, growing exponentially thinner by the day. But we don’t really know whether that is at all required until we see the foundation completed.

So there we have the recent developments. I’m sorry, this and the coming updates may not interest many of you. There won’t be many pretty pictures. But I am immensely interested in these things, knowing how things are done here in Germany compared to other places. I swear, there were days when I thought I could have very well enjoyed being an engineer
probably more than the “profession” I chose to pursue, if there ever was one.

Anyhoo, until the next update!